HEMMING MARIGOLD CIRCLE SKIRT WITH BIAS TAPE
Posted by Natasha Chrismas on

It's Hanny from iCutie. Today, I'm going to share with you a simple method to hem the Marigold dress using bias tape.
In this tutorial, I’ve used 1/2 inch pre-made cotton bias tape in white. Bias Tape can be made yourself, or for an easy and simple option, premade from your local craft shop. It comes in many different colours and widths.

Prep the skirt as per the pattern's tutorial.
- Open up one side of your bias tape, place it on top of the skirt, right sides together. Sew the bias tape using a 1/4” (6mm) seam allowance. Usually this is in the first little crease on the tape. If you find this a little tricky, use some pins.
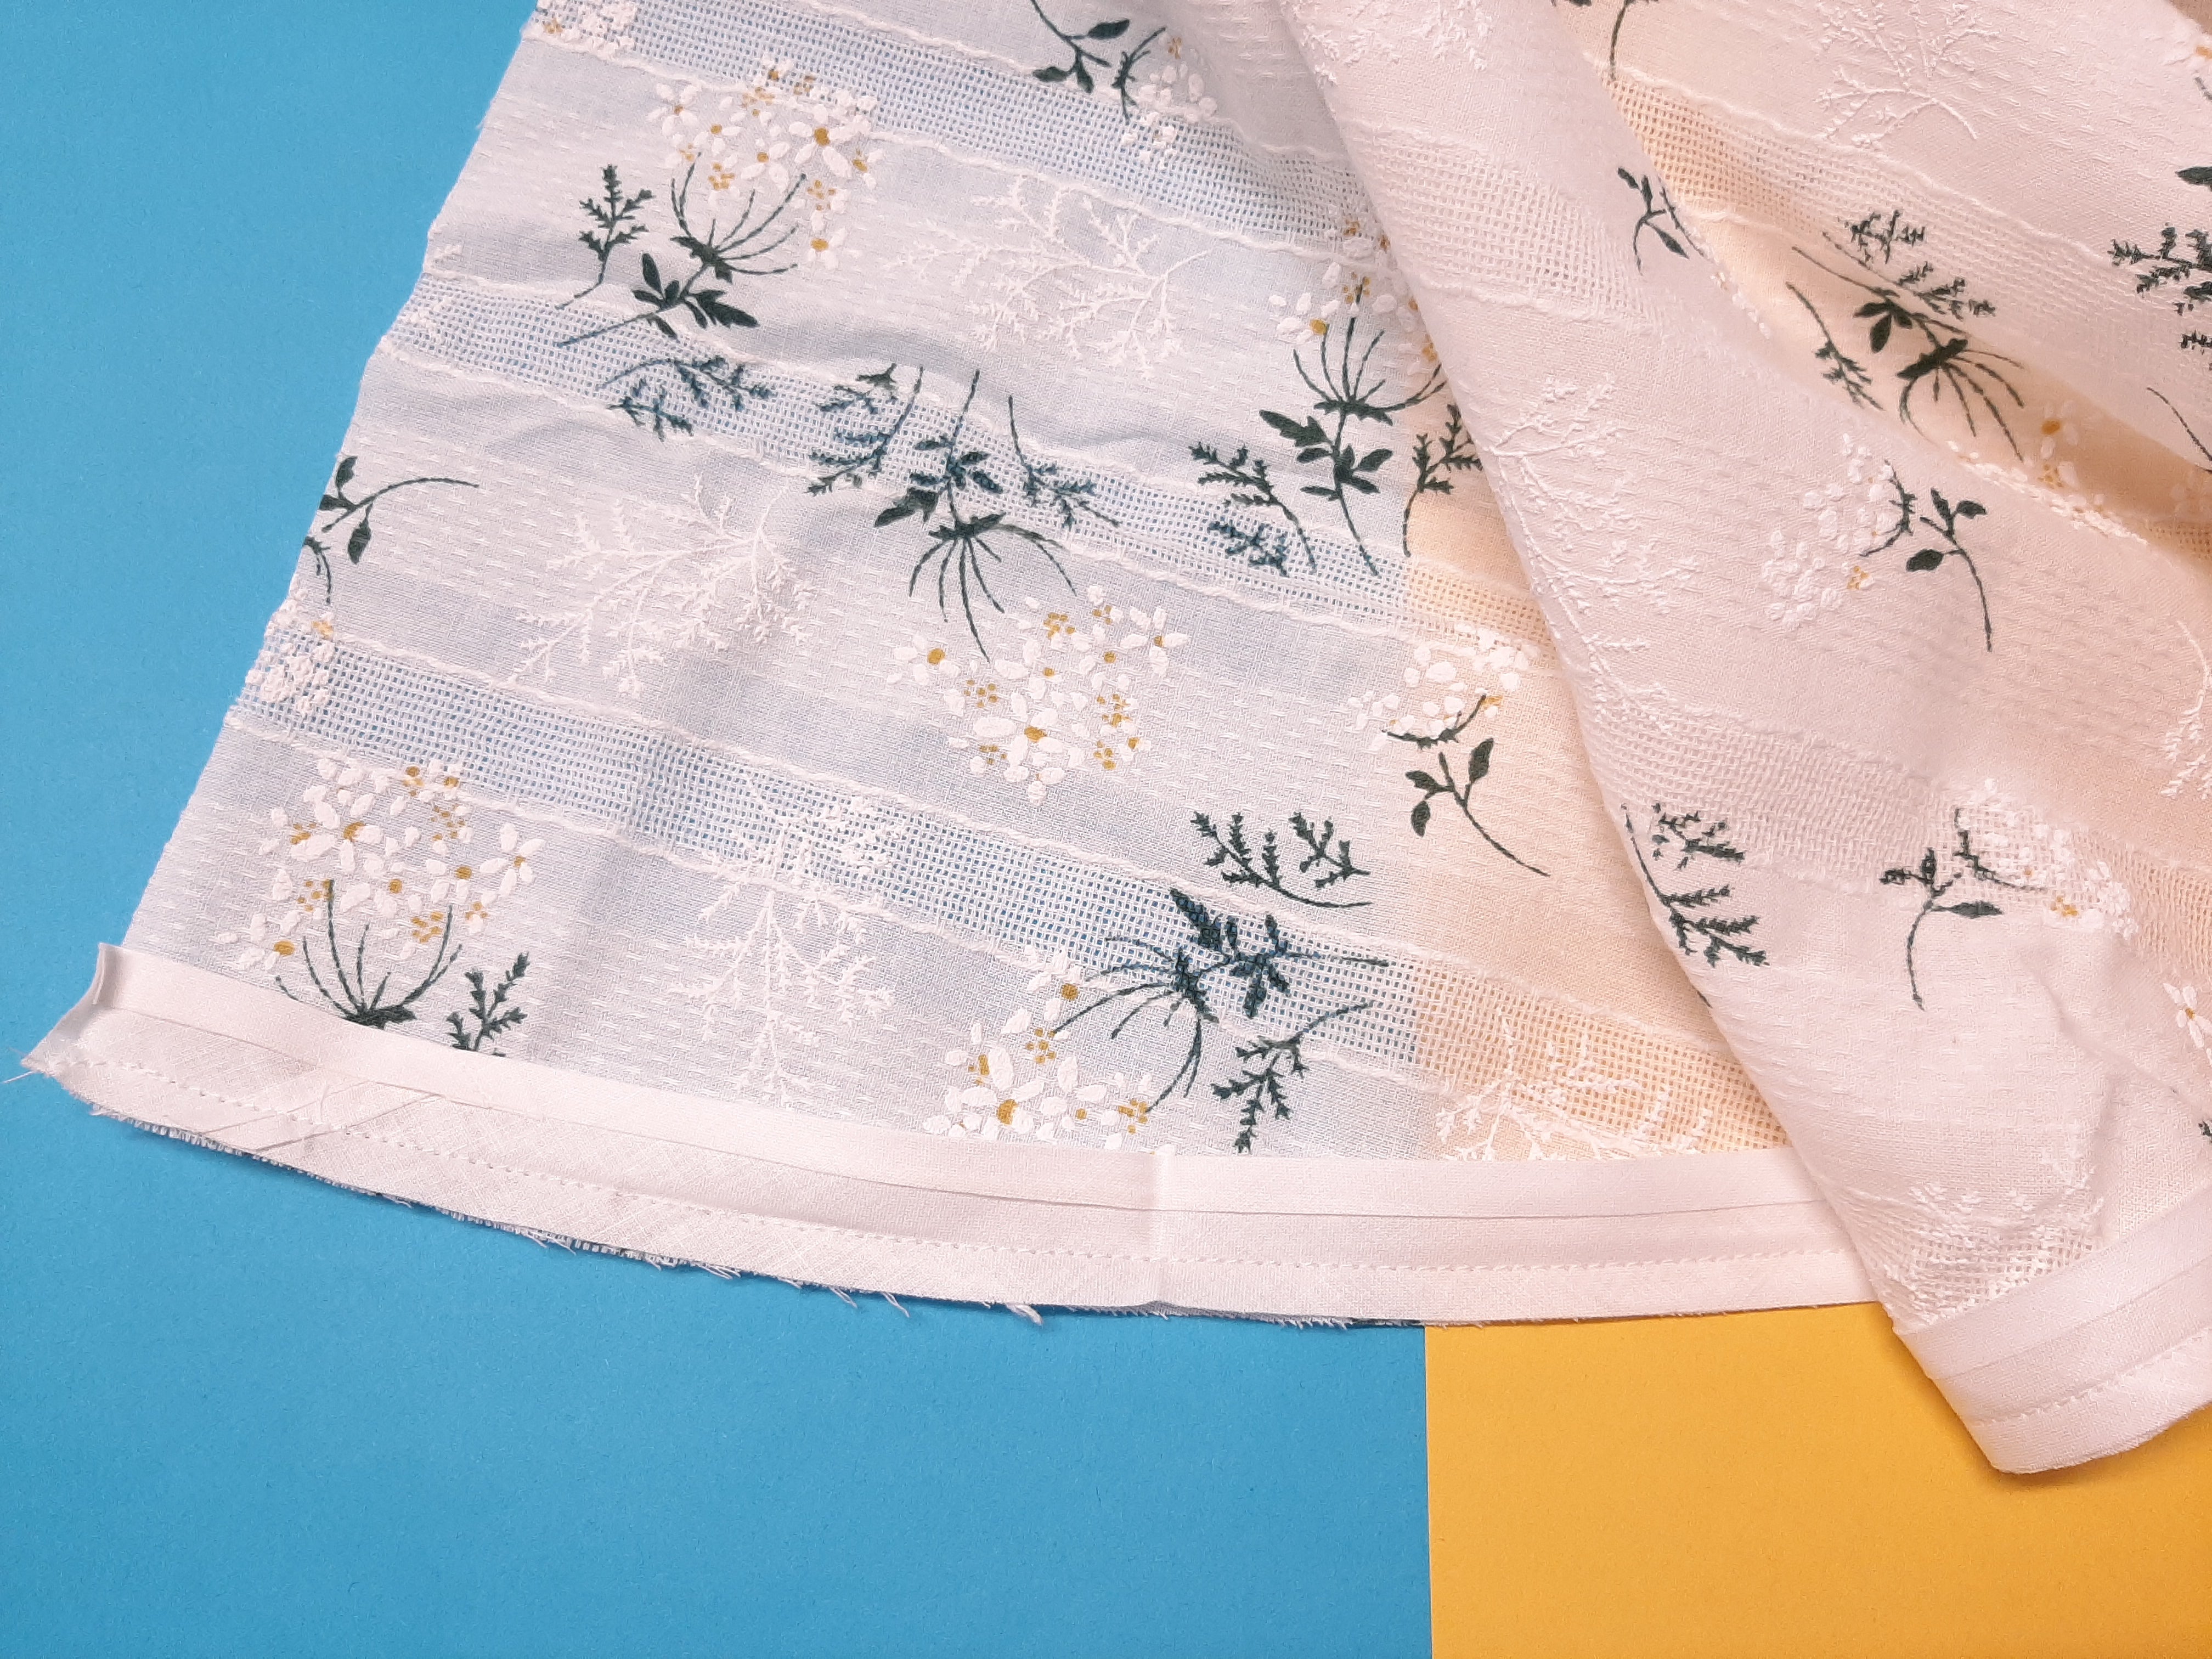
- Press the seam away from the skirt. Be careful not to unfold the folded edge of the tape.

- Fold the bias tape toward the wrong side of the skirt.

- Edgestitch the bias tape to the skirt hem.


Follow the pattern's instruction to finish off your Marigold.

*** BONUS ***
I used the little circle offcut from Marigold's waist seam to make this bow. It makes a nice hair accessory. If you would like to make one, read on.

- Cut the circle in half, and 1 piece of fabric 3 cm wide by 5 cm long.

- Place the 2 half circles right sides together. Sew with 1/4" (6mm) seam allowance. Leave the middle open so you can turn it out later (A).
Fold the middle piece 1 cm both sides, press well (B).

- Turn (A) inside out, press.
Set the stitch length to 5 (or your longest stitch) and sew a line down the middle of the bow. Pull to gathering stitch to draw the bow in firmly.

- Use (B) to wrap around the centre of the bow. Hand stitch in place.

- You can attach a hair clip, hair pin, or hair tie to the back. Now you have a cute little hair bow to match your new dress.

Happy sewing
x Hanny x