HOW TO - DAISY Dress with alternative steps for an enclosed bodice, sleeves and covered back.
Posted by Natasha Chrismas on
Hello, it's Hanny from iCutie here!
For today blog post, I'm going to share with you how I modified the back bodice of the Daisy dress to be a closed back while also enclosing the bodice and the sleeves.


PART 1 - Redrawing the Back Bodice
Trace the back bodice onto a piece of paper (1), lay the front bodice piece on top, match at the side seam, draw around to create new pattern piece (2). Your new back bodice should look like this (3).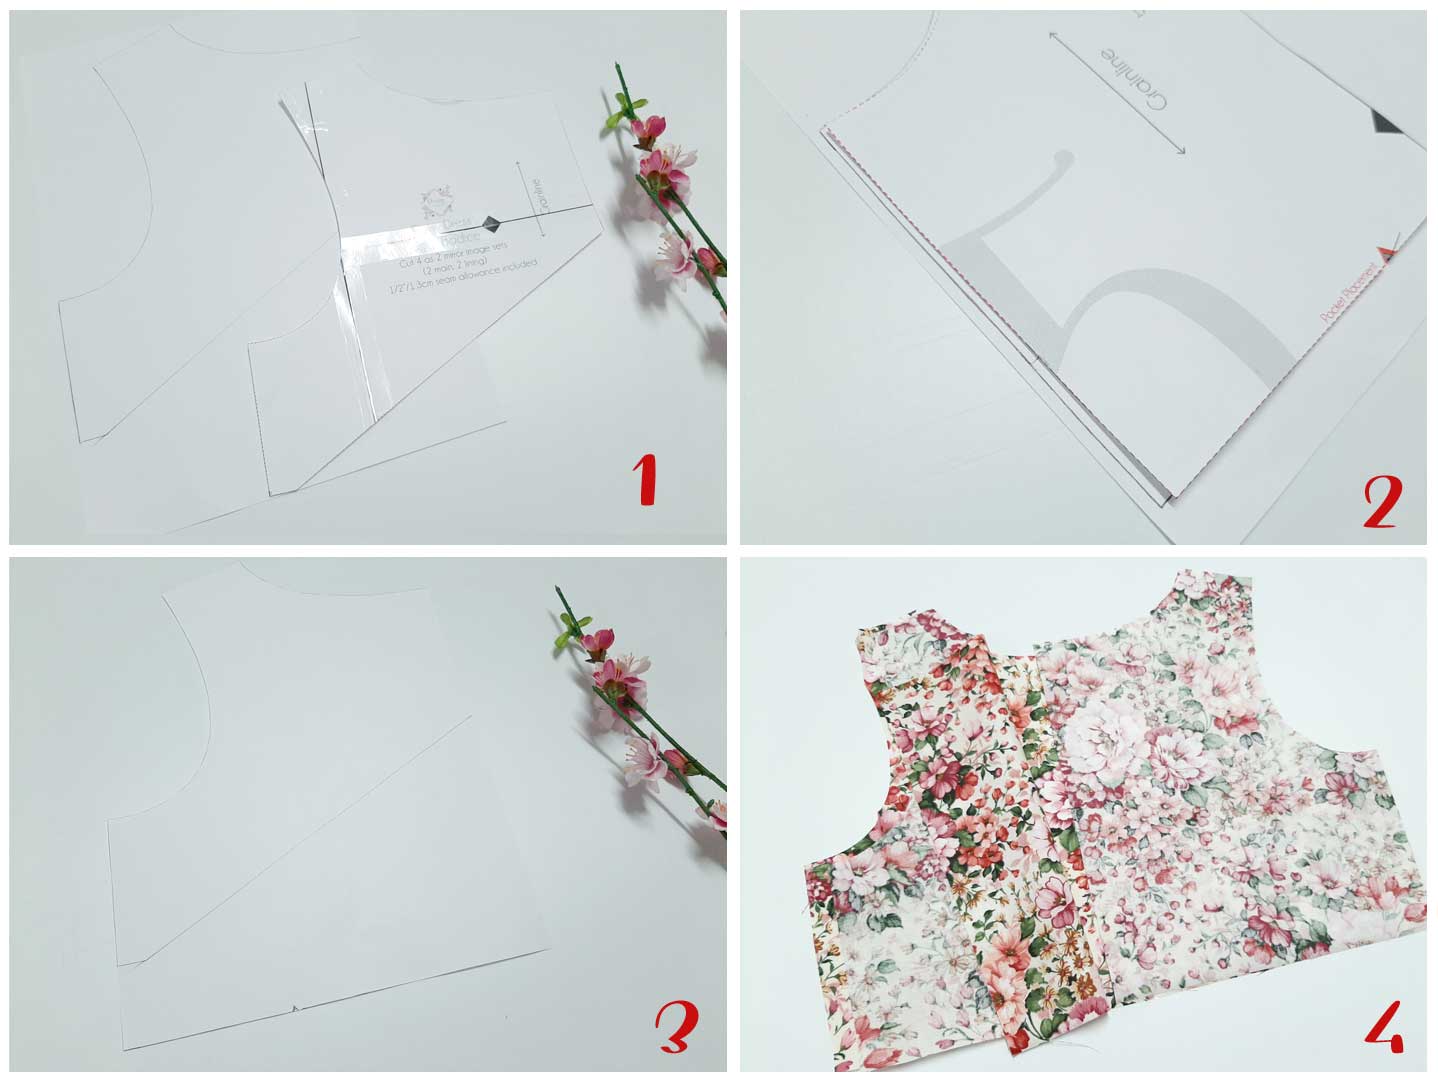
PART 2 - Enclosing the Sleeves
I chose 3 different fabrics to make the process as easy as possible for you to follow. You don't have to do the same!

- Sew the front and back main bodice right side together at the shoulder, repeat for the lining pieces. Mark 1 1/2 - 2 inches from the bottom of the armhole on all pieces.

- Baste a sleeve onto your bodice right sides together. Start/stop at the red mark. Repeat for the other side

- Lay the lining on top, right side down, pin and sew the armholes, remember to start/stop at the red mark. Roll the sleeves as small as you can, sandwich it between the main and lining, sew the neckline being careful not the catch the sleeves. Trim the seam allowance.
Lift the lining up, pull the sleeves out. It can be tricky on small sizes, take it slow so you don't rip it.

- Now lay the main bodice back and front on top of each other right sides together. Match point A and B, sew the side seams.


- Open up the lining, match point A and B, sew the side seams.

- Match point A and B on the sleeves, sew and serge/overlock the seams.

- Lift up the lining, pull the sleeves out through the opening.

- Match up the seams of the lining, sleeve and main, pin in place, sew them shut. Trim the seam allowance.

- Give it a good press.

- Open up the back lining, match point A and B right side together and sew, do not sew the last 2 inches at the bottom of the bodice. Repeat on the other side.


PART 3 - Enclosing the Bodice
Follow the instruction below for a clean finish with no exposed seam at the waistline.

- Prep your skirt as per instructions in the pattern.
Fold the lining up 1/2'' toward the wrong side, press in place.
Pin the skirt to the main bodice, right side together, leave 1/2 inch seam allowance on each side of the bodice, sew in place.

- Turn everything out, press the seam toward the bodice.

- Pull the lining out, toward the main and align the raw edges. Sew in place.

- Turn the dress inside out, pin the bodice lining to the skirt, starts at the side seams, divide the pins evenly all the way around, use as many pin as you need.


- Turn the dress right side out, carefully topstitch as close to the edge as possible. Check as you go that the lining is being caught. Don't forget to take out the pins as you sew. Add buttons and button holes per the pattern. Look at that beautiful finish, inside and out.

Happy sewing x
Hanny
